HT for Web 3D. HT for modern web and mobile app development. www.hightopo.com
分类: HTML5
2017-12-03 22:00:51
不管在任何领域,只要能让非程序员能通过拖拽来实现 2D 和 3D 的设计图就是很牛的,今天我们不需要 3dMaxs 等设计软件,直接用 HT 就能自己写出一个 2D 3D 编辑器,实现这个功能我觉得成就感还是爆棚的,哈哈!只要你会想,能做,就能根据这个编辑器延展成 big thing!
本例地址:
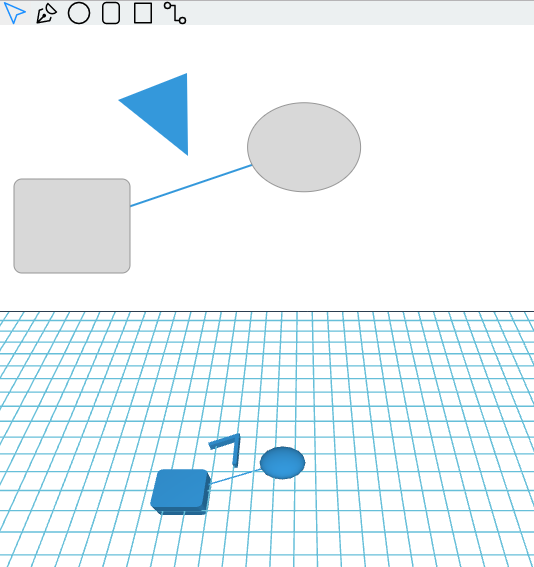
下面是实现效果图:

我们首先将所有需要用到的 json 文件作为矢量图输出,矢量图的好处是组件上的图元缩放都不会失真,并且不再需要为 Retina 显示屏提供不同尺寸的图片, 在 devicePixelRatio 多样化的移动时代, 要实现完美的跨平台,矢量可能是的最低成本的解决方案。
HT 通过 ht.Default.setImage 函数来注册图片,可以是 base64、jpg、 png 以及 json 格式的图片:
ht.Default.setImage('edit', 'images/default.json');
ht.Default.setImage('shape', 'images/edit.json');
ht.Default.setImage('edge', 'images/edge.json');
ht.Default.setImage('circle', 'images/circle.json');
ht.Default.setImage('roundRect', 'images/roundRect.json');
ht.Default.setImage('rect', 'images/rect.json');
这边我注册的是顶部工具条的 6 个图片,分别为“编辑”、“不规则图形”、“圆”、“圆角矩形”、“矩形”以及“连线”,功能如其名。主要操作:点击工具条的任意一个图标,在工具条下的空白处拖动鼠标,即可实现绘图。
那么接下来的步骤就是创建“工具条”,HT 封装了工具条的组件 ht.widget.Toolbar 在这个函数的参数中填入工具条中的元素,具体操作方法请看 ,这边值得注意的一个点是,groupId 是将一个类型的元素分组,分组的好处是在我们选中这个组中的任意一个元素的时候,其他的元素都不选中,就能造成“单选”的效果:
toolbar = new ht.widget.Toolbar();
toolbar.addItem(createItem('edit', 'edit', '编辑', [ new ht.graph.EditInteractor(graphView)]));//这边最后一个参数数组可放置多个交互器,具体定义请参见
//addItem(item, index)可在指定index位置插入新元素,index为空代表插入到最后。 toolbar.addItem(createItem('shape', 'shape', '不规则图形',  [ new CreateShapeInteractor(graphView)]));
toolbar.addItem(createItem('circle', 'circle', '圆', [ new CreateNodeInteractor(graphView)]));
toolbar.addItem(createItem('roundRect', 'roundRect', '圆角矩形', [ new CreateNodeInteractor(graphView)]));
toolbar.addItem(createItem('rect', 'rect', '矩形', [ new CreateNodeInteractor(graphView)]));
toolbar.addItem(createItem('edge', 'edge', '连线', [ new CreateEdgeInteractor(graphView)]));
toolbar.getItemById('edit').selected = true;//默认选中“编辑” toolbar.getSelectBackground = function(){//重载自定义选中背景颜色 return '#eee';
}
在上面用到的 addItem 函数是向 ht.widget.Toolbar 工具条中添加元素,添加的元素是从 createItem 函数中传回来的元素,我们在这个函数中利用了 vector 矢量创造了一个矩形和一张图片的结合体,我们将之前注册好的矢量图传给这个结合体中的“图片”,然后通过控制这个图片的“渲染颜色”,来过滤工具条选中和非选中状态的颜色:
function createItem(id, iconName, toolTip, interactorsArr){ var item = {
        id: id,//工具条元素的唯一标示,如果设置可通过getItemById获取 unfocusable: true,//工具条元素是否不可获取焦点,默认鼠标滑过时会显示一个矩形边框,可设置为true关闭此效果 icon: iconName,//工具条元素的图标 toolTip: toolTip,//工具条元素的文字提示 groupId: 'bar'//对工具条元素进行分组,同一个分组内的元素选中会自动出现互斥效果  }; var json = ht.Default.getImage(iconName); var width = json ? json.width : 16; var height = json ? json.height : 16;

    item.icon = {
        width: width + 8,
        height: height + 8,
        fitSize: json ? json.fitSize : false,
        comps: [
            {
                type: 'rect',//组件类型 rect: [0, 0, width + 8, height + 8]//指定组件绘制在矢量中的矩形边界  },
            {
                type: 'image',
                name: iconName,
                color: {//渲染颜色,HT系统会自动采用该颜色对图片内容进行渲染 func: (data, view) => { return '#000' }
                }
            }
        ]
    };

    item.action = function(){//函数类型,工具条元素被点击时调用 for(var i = 0; i < toolbar.getItems().length; i++){
            toolbar.getItems()[i].icon.comps[1].color = '#000';
        }
        item.icon.comps[1].color = '#1E90FF';
        graphView.setInteractors(interactorsArr);//组合多个交互器 graphView.sm().clearSelection();//每次工具条有点击的时候就清空所有的选中  } return item;
}
接着利用 HT 封装的面板组件 将整个界面分成两个部分:顶部和底部。我们又利用 HT 封装的 分割组件将底部分为上下两个部分,最后将这个外边框 borderPane 添加进 body 体中:
splitView = new ht.widget.SplitView(graphView, g3d, 'v', 0.5);
borderPane = new ht.widget.BorderPane();
borderPane.setTopView(toolbar);
borderPane.setCenterView(splitView);
borderPane.addToDOM();
整个场景都制作完毕,接着就是功能部分。我们把制作“不规则图形”作为一个单独的部分放到 CreateShapeInteractor.js 中,制作“圆”、“圆角矩形”以及“矩形”三个部分分为一个部分放到 CreateNodeInteractor.js 中,将“连线”分为一个部分放到 CreateEdgeInteractor.js 中,接下来我们将对这三个 js 文件一个个解析。
这三个 js 文件的共同点是通过 HT 封装的继承函数 ht.Default.def 继承并创建新的类,这三个类我们在前面的代码中是有提到的: CreateShapeInteractor、CreateNodeInteractor 以及 CreateEdgeInteractor 类,都大同小异,我们这里重点解析 CreateNodeInteractor.js 文件。
首先就是要声明定义一个 CreateNodeInteractor 类,就是这三个部分:

var CreateNodeInteractor = function (graphView) {
    CreateNodeInteractor.superClass.constructor.call(this, graphView);
};
ht.Default.def(CreateNodeInteractor, ht.graph.Interactor, { //自定义类,第一个参数为类名,第二个参数为继承的类,第三个参数为此类的方法 //这边重新绘制这个类的方法 }
接着就是向这个类中添加我们需要的功能,主要的功能是“鼠标点击事件的触发”以及“触摸屏幕事件的触发”,我们通过对事件的监听来绘制图形,首先就是判断鼠标左键或者触屏是否点击:
handle_touchstart: function (e) {//触屏 开始点击 ht.Default.preventDefault(e);//阻止所有的默认交互事件 if (ht.Default.isLeftButton(e)) {//鼠标左键是否点击 this._graphView.setFocus(e);//设置焦点 this.p1 = this._graphView.lp(e);//获取当前逻辑坐标点 this.startDragging(e);//调用 startDragging 开始拖拽函数   }
}
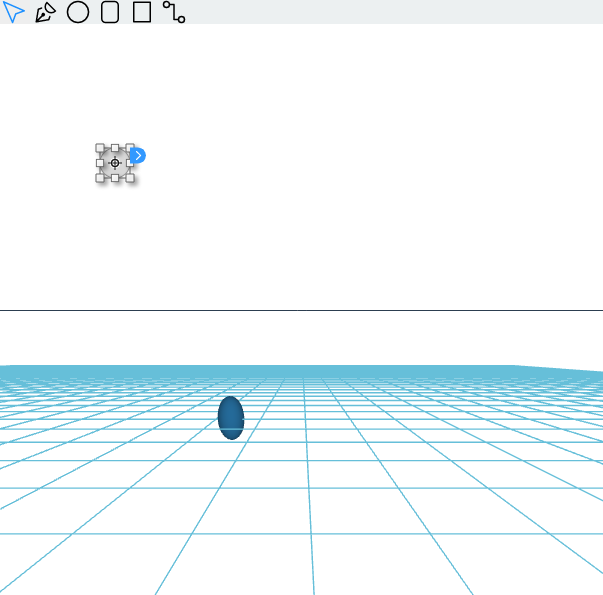
然后对鼠标弹起或者触屏是否结束进行事件的判断,并直接生成一个 ht.Node 节点。HT 把单纯的点击事件和拖拽事件分为两种命名格式,单纯的点击事件为 handle_* 方法,拖拽事件是 handleWindow* 方法。上面的代码就是从点击工具条的能触发 CreateNodeInteractor 类的元素开始,到放到界面中生成图元结束。并没有拖拽的过程,会有一个默认的大小:

HT 默认调用 ht.graph.DefaultInteractor 事件,里面有一系列的操作,我们现在要做的拖拽跟这个有冲突,所以在前面我们先将这个默认的事件阻止,获取鼠标点下的第一个点的逻辑坐标和第二个点的逻辑坐标,根据这两个坐标的点生成一个矩形,然后开始绘制节点:
handleWindowTouchMove: function(e) {
    ht.Default.preventDefault(e);//阻止事件的默认行为,常用于屏蔽触屏上默认DoubleTap缩放等行为 if (!this.p1) { return;
    } this.p2 = this._graphView.lp(e);
    const rect = ht.Default.unionPoint(this.p1, this.p2);//将 p1 和 p2 两个点组合成一个矩形 if (this.node) { this.node.setRect(rect);
    } else { if (!rect.width || !rect.height) { return;
        } this._graphView.dm().beginTransaction();//类似数据库里开启事务,从beginTransaction()到endTransaction()之间所有的修改可被一次性撤销或重做 this.createNode(rect, false);//调用 createNode 函数  }
}
然后在拖拽结束的时候做结束绘制图形的操作,这里我是直接设置绘制结束后就将工具条选中“编辑”的元素:
handleWindowTouchEnd: function(e) {
    ht.Default.preventDefault(e); this._graphView.dm().endTransaction();//类似数据库里结束事务,从beginTransaction()到endTransaction()之间所有的修改可被一次性撤销或重做 if (!this.node && this.p1) { this.createNode({
            x: this.p1.x - 25,
            y: this.p1.y - 25,
            width: 50,
            height: 50 }, true);
    } var continuousCreating = false; if (!continuousCreating) { for(var i = 0; i < toolbar.getItems().length; i++){
            toolbar.getItems()[i].selected = false;
            toolbar.getItems()[i].icon.comps[1].color = '#000';
        }
       toolbar.getItemById('edit').selected = true;
        toolbar.getItemById('edit').icon.comps[1].color = '#1E90FF';
        borderPane.iv(); this._graphView.setEditable(true); this._graphView.sm().ss(this.node);
    } else { this.node = this.p1 = this.p2 = null;
    }
}
最后,我们只要知道如何绘制图元就好了,在 HT 中,基础的图元都可以通过设置样式中的 shape 或者 shape3d 来生成不同的图元,我们这边就是通过这种途径,如果想要在界面中生成复杂图形,如:机柜模型,可以参考这篇文章:http://www.cnblogs.com/xhload3d/p/7887229.html
createNode: function(rect, click) { // create instance if (ht.Default.isFunction(this.type)) { this.node = this.type(rect, click);
    } else { this.node = new ht.Node();
    } this.node.setTall(50);//为 3D 图形做准备,设置其厚度,才会有立体感 if(toolbar.getItemById('circle').selected){//如果工具条的 ‘circle’ 被选中 this.node.s({//设置 style 样式 "shape": "oval",//椭圆形,为空时显示为图片,可设置多边形类型参见入门手册 "shape.background": "#D8D8D8",//多边形类型图元背景 "shape.border.width": 1,//多边形类型图元边框宽度 "shape.border.color": "#979797",//多边形类型图元边框颜色 "shape3d": "sphere"//为空时显示为六面立方体,其他可选值为box|sphere|cylinder|cone|torus|star|rect|roundRect|triangle|rightTriangle|parallelogram|trapezoid  });
    }else if(toolbar.getItemById('roundRect').selected){ this.node.s({ "shape": "roundRect",//圆角矩形 "shape.background": "#D8D8D8", "shape.border.width": 1, "shape.border.color": "#979797", "shape3d": "roundRect" });
    }else if(toolbar.getItemById('rect').selected){ this.node.s({ "shape": "rect",//矩形 "shape.background": "#D8D8D8", "shape.border.width": 1, "shape.border.color": "#979797", "shape3d": "rect" });
    } // set bounds if (click) { this.node.setPosition(rect.x + rect.width / 2, rect.y + rect.height / 2);//设置 node 的坐标点  } else { this.node.setRect(rect);//设置 node 的外矩形边框大小  } // add to data model this._graphView.dm().add(this.node);//将这个 node 添加进数据容器 DataModel 中 }
到此,创建 ht.Node 节点的声明全部结束,大家可以根据自己的想象创建你想要的编辑器!