2008R2Win7管理二十一Web之IIS7.5
本篇介绍简单web网站搭建以及单IIS多域名,另外介绍下2008R2上的iis已经更新到7.5了,那么7.5又为我们带来了哪些变化呢,下面转自网友们从msdn翻译过来的原文如下
虽然是更新到7.5了,但是仍然只是支持htm和asp和cgi至于目下正流行的php还得另辟蹊径.从php网站下载某文件,然后安装到iis才能让iis支持php
更新列表:
1. 内容发布扩展(FTP, WebDav)集成进Web服务器OS
2. 集成Administration Pack扩展到Windows Server OS
3. 新的IIS7 PowerShell Provider和Commandlet支持
4. 丰富的Server Core应用程序托管
5. 改进的FastCGI支持
6. IIS核心更改
支持配置系统的自定义追踪。
通过配置轮询来审核或追踪配置变更的能力——这是来自托管商们的要求,特别是想要监视客户们更改配置系统。
ASP.NET支持不同的CLR版本(例如,CLR4.0),随着多个CLR版本的使用,这个特性对开发者切换版本很重要。我们也将此功能向后移植到Windows Server 2008 SP2。
Application pools的更好控制,可以为每应用程序池指定CLR设置,可以用新的Application Pool性能计数器监视性能。
可委派自定义错误,这是来自开发者的最多要求,他们想让非管理员在本地或远程改变自定义错误。
IP restriction list的IPv6支持。
Request filtering的更细粒度控制,特别对query strings来帮助防止SQL注入式攻击。Request filtering现在也支持请求特定的规则,使SQL注入规则仅对特定请求适用。
Nego2支持,将允许内置支持LiveID providers,FedSSP,和更小粒的Kerberos/NTLM使能。
支持不要求密码的Managed Service Accounts域账号。
AppPool identity支持
支持application pool预热,大型应用程序会需要"起动"一个应用程序池,这样最初的请求们会有更好的性能。
7.IIS Best Practice Analyzer
如此看来更新的内容更加适合下一代互联网,IPV6的支持以及对webdav的支持.
本篇分为1.安装2.简单网站设置3.多域名
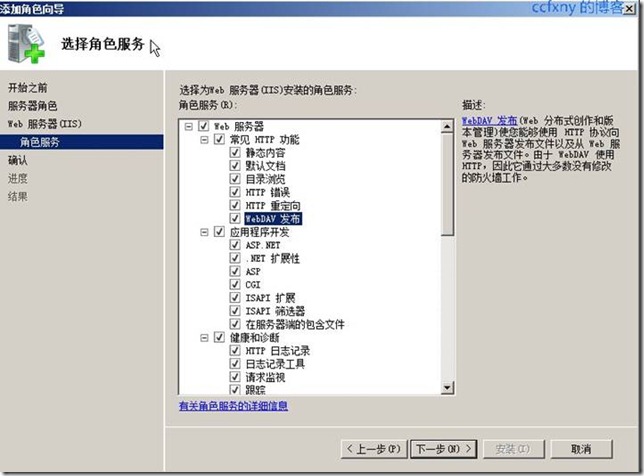
1. 安装web功能
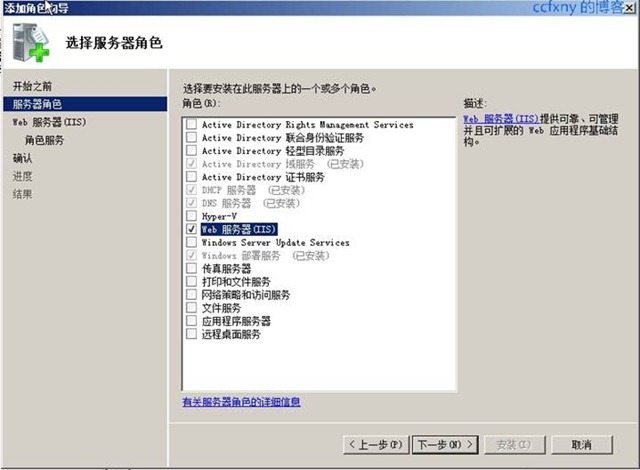
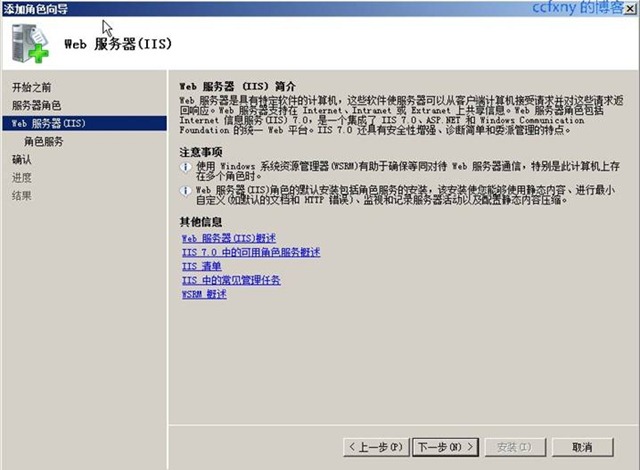
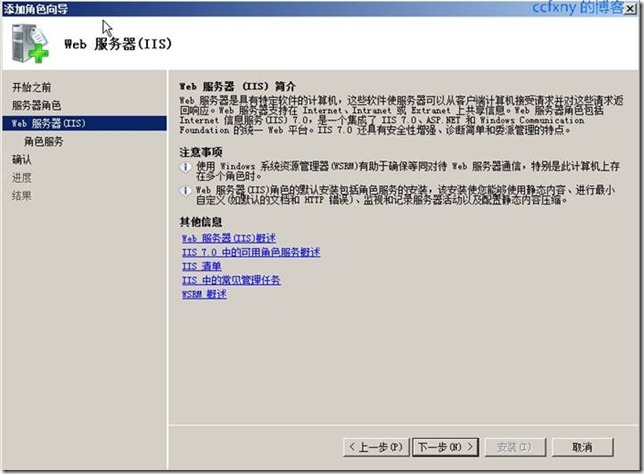
首先是使用服务器管理中的添加角色向导来启动角色向导以添加web服务器角色
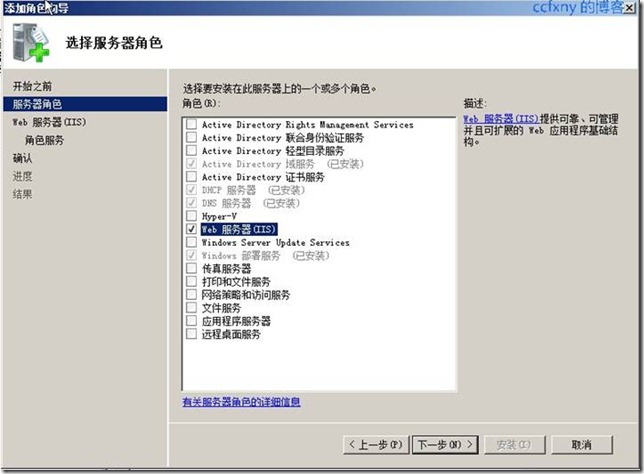
角色介绍,以前是叫iis,现在给加了个web服务器的名头在前面
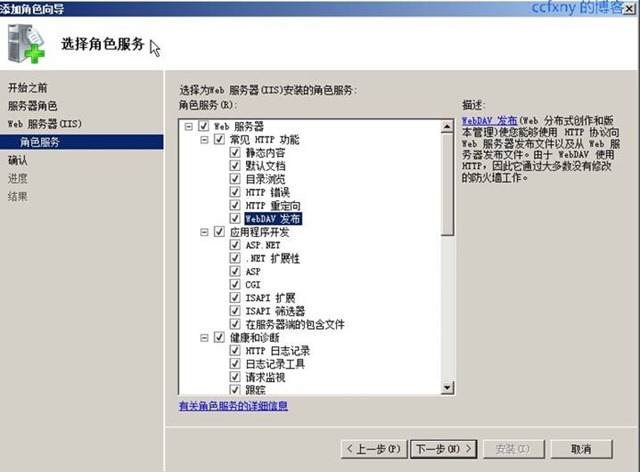
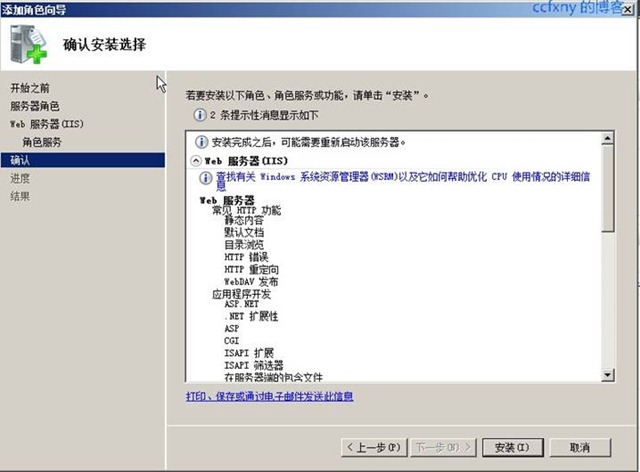
所有功能都安装上,好好体验一把IIS7.5
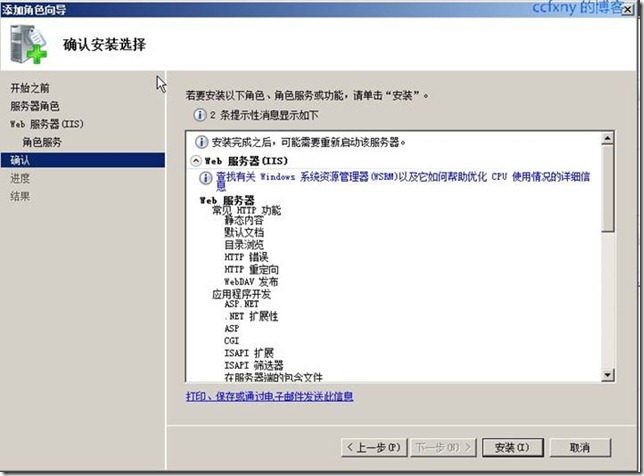
所有选择上的角色确认
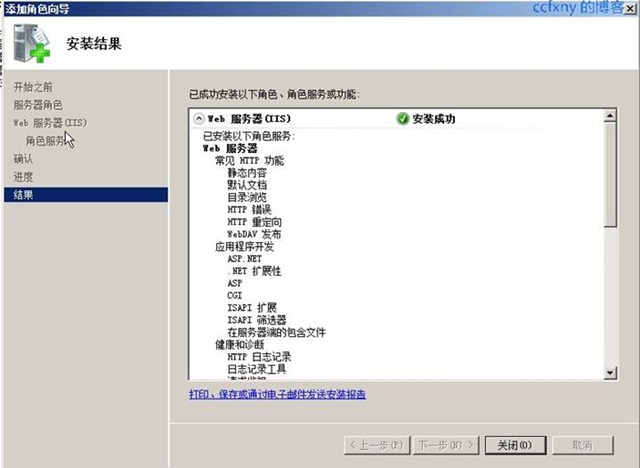
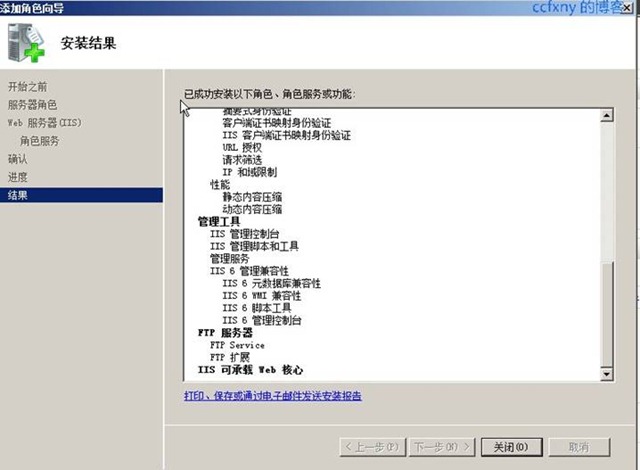
安装完成

已经安装如下的角色
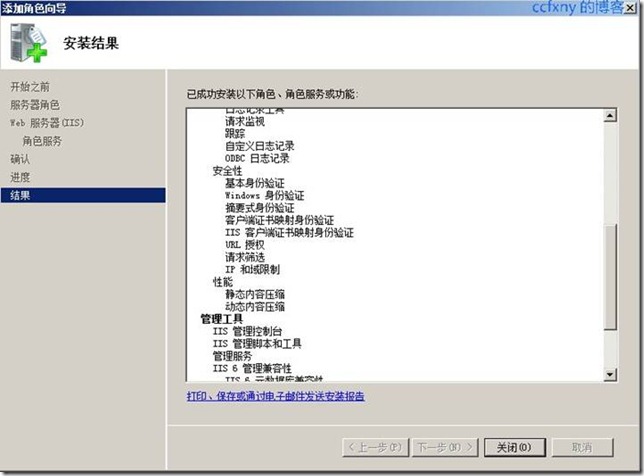
图3

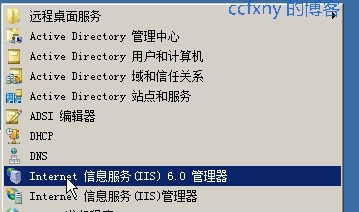
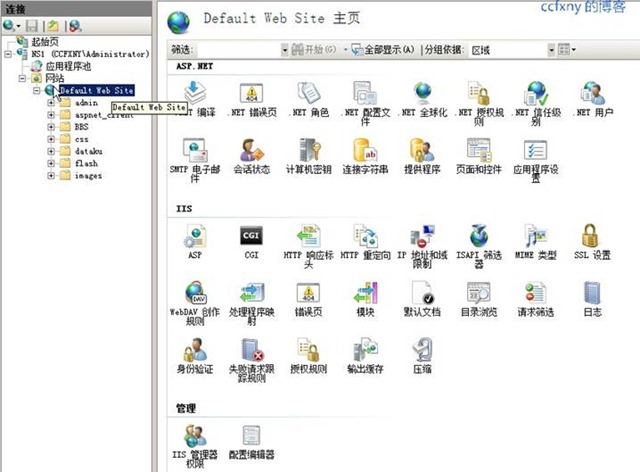
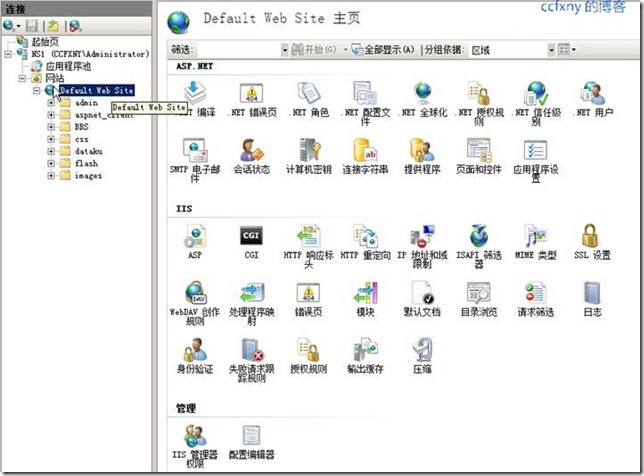
安装完成后管理工具可以找到iis管理和旧版的iis6.X系列的管理器

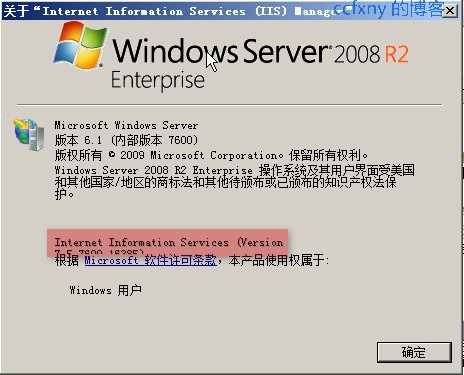
打开默认的管理器如图

看看IIS版本,版本为7.5 7600 16385

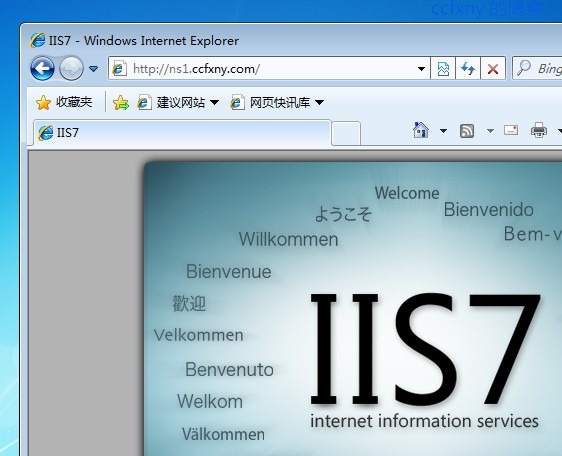
在win7客户端上以主机名打开默认网站可以看到iis7的欢迎页面

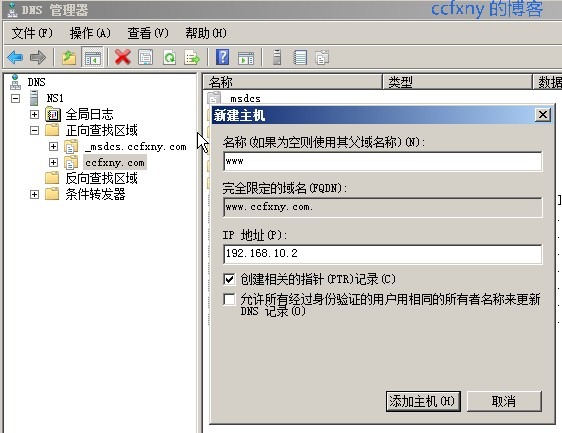
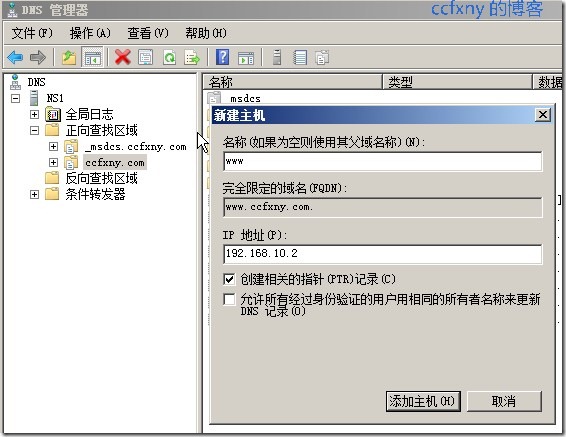
在dns上新建一个主机头,www,ip指向NS1的ip
在客户端win7上以打开网站也能打开了

2. 网站设置
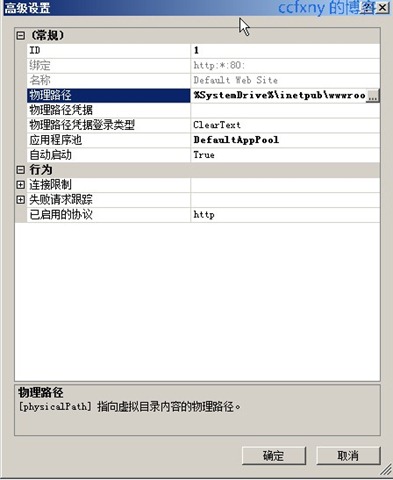
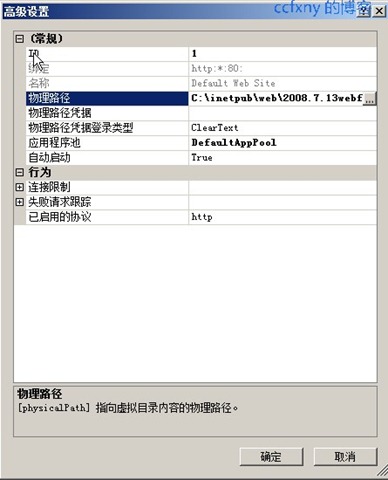
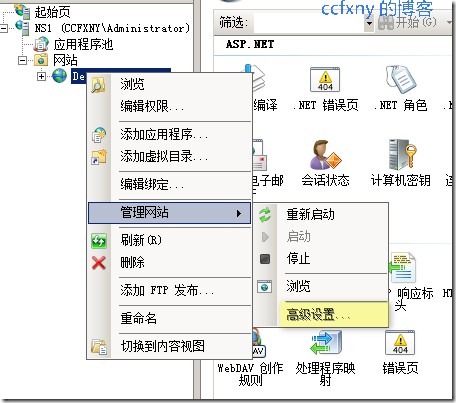
下面我们讲默认网站改成我们自己的网站,在默认网站是哪个单击管理网站-高级设置
在物理路径上单击浏览按钮,选择我们自己的网站,并确定

更改完成,单击确认生效

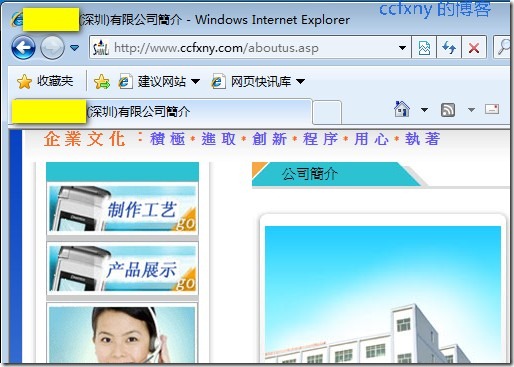
再打开网站已经是我们自己的网站啦!
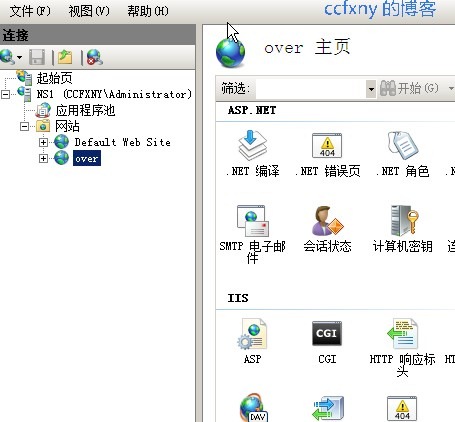
另外给大家看下所有能设置的功能总揽,单击某选项进入设置即可,跟iis6.0系列完全不一样了.利用iis,我们可以将公司经常需要访问的网站自己利用word简单做个索引页面并设置为公司内部首页等.另外nod32升级服务器也可以使用iis来构建哦.本篇仅为简单抛砖引玉.
3. 多域名在同一IIS共存
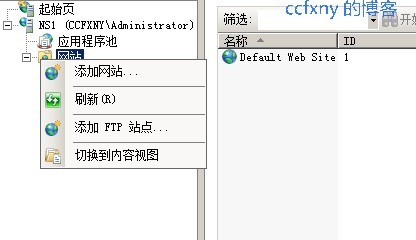
在论坛经常有朋友问我说,在iis中有多个站点,都要占用80端口怎么办,那么下面的多主机头的解决方案就是一种,我们单击添加网站来添加一个新的网站,为大家演示一下

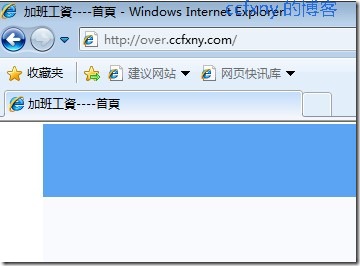
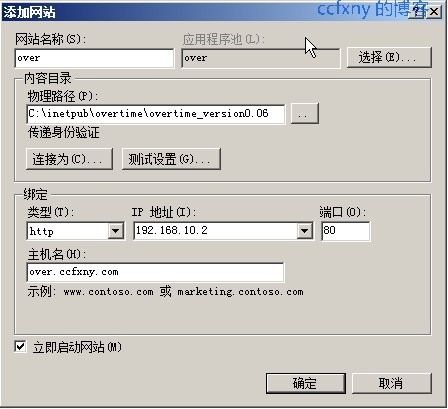
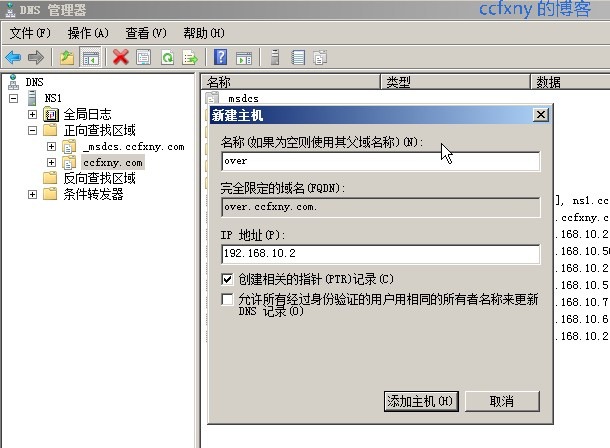
输入新网站的名称,和物理路径,类型默认http,选中本地IP,端口80默认,然后输入主机名,可以是二级域名也可以是顶级域名,然后辅以DNS将over.ccfxny.com解析到这个内部Ip或者外部IP即可正常访问,

网站创建完成

DNS中建立主机头,over主机头,指向内部的ip即可,外部的需要将10.2映射到外部IP上,再在外部dns上做主机名才可以再外部访问.

创建完毕,在win7这台域内的客户端实现访问正常!