分类: 嵌入式
2013-05-21 22:05:53
is a set of scripts and patches for the creation of a cross-compilation toolchain as well as the creation of a complete root file system. Buildroot provides:
Buildroot needs some software to be already installed on the GNU/Linux host system. Please check:
Please make sure that at least the mandatory packages are installed before launching a build.
Buildroot releases can be downloaded from
Daily Snapshots of the latest Buildroot source tree can be downloaded from
The source tree can be browsed online: and a copy of the repository can be grabbed with the following commands:
The following is the project directory tree:
.
├── arch
├── board
├── boot
├── CHANGES
├── Config.in
├── Config.in.legacy
├── configs
├── COPYING
├── docs
├── fs
├── linux
├── Makefile
├── Makefile.legacy
├── package
├── support
├── system
└── toolchain
For modifying the Buildroot configuration, enter the project directory and enter the following command:
make menuconfig
You can optionally use the O= parameter to set a specific build folder:
make O=menuconfig
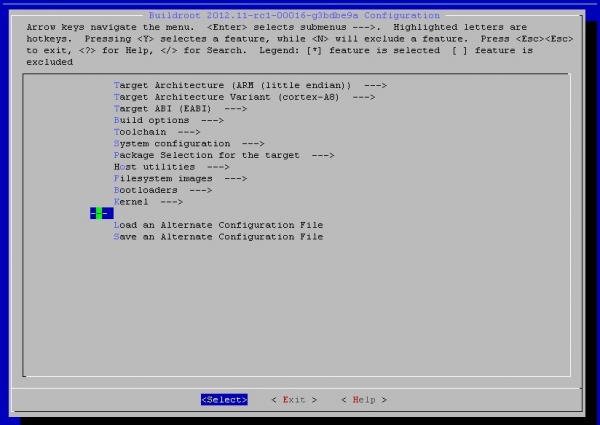
Once everything is configured, the configuration tool generates a .config file that contains the description of the configuration. It will be used by the Makefiles to do what’s needed.
From the menuconfig interface, you need to select:
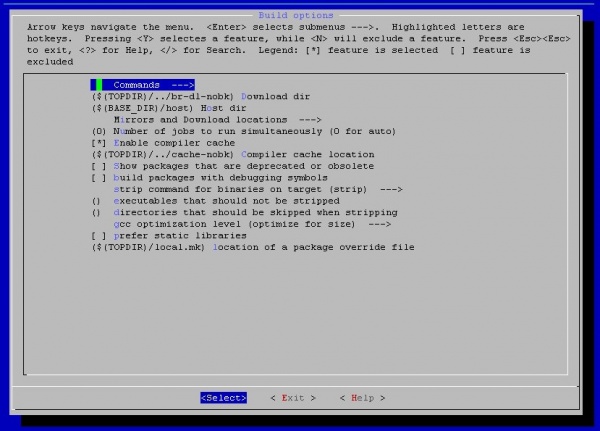
From the Build options menù you can define some custom directories for compilation output and file download. It is also recommended to enable the compiler cache and optionally set a custom directory.
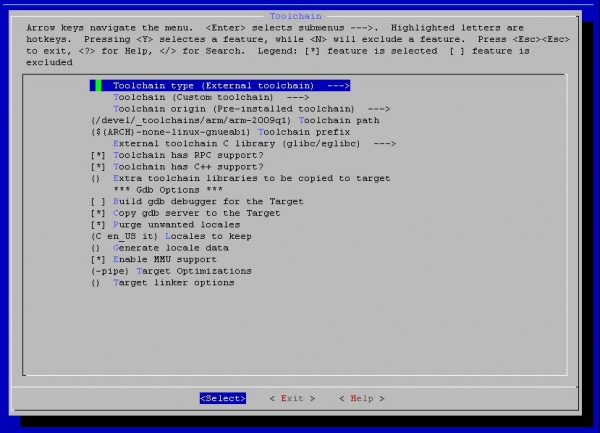
You need to set the path and prefix for the external toolchain:
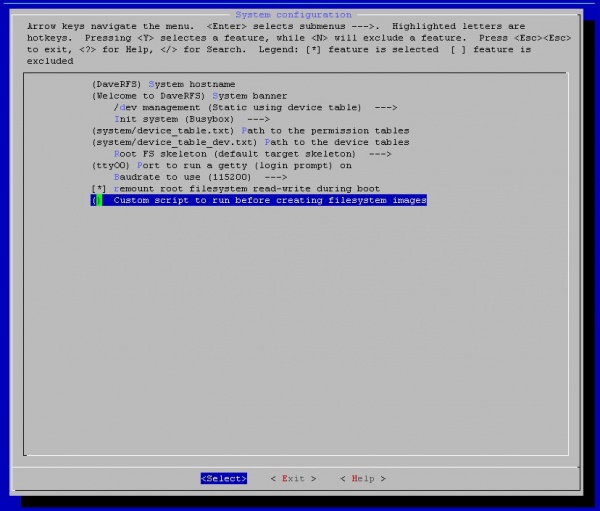
Entering the "System configuration" option you should set:
The list of available packages can be accessed entering the Package selection for the target option
It's important that busybox provides the depmod command, which is not enabled by default. To enable it, you need to modify the buildroot/package/busybox/busybox-1.20.x.config file adding
CONFIG_DEPMOD=y
CONFIG_DEFAULT_DEPMOD_FILE="modules.dep"
Once the configuration step is completed, launch
make O=
to start the build process (the "O=" parameter is optional), which will perform the following tasks:
Buildroot output is stored in a single directory, output, and you'll find all the built images (kernel image, bootloader and root filesystem images) stored into the images subdirectory. In particular, the root file system is saved as a rootfs.tar file. This file can be decompressed to a NFS share and used to boot the target from the network for testing and further customization steps.
For more information, please refer to on the User Manual.
The targets usually provides specific features that relies on software components which can't be provided by the standard Buildroot project. Adding these components to the Buildroot root file system usually requires further operations, which depends on the particular target. The following sections provide instructions on how to perform these operations on DAVE's targets.
The following procedure allows adding the NELK components to the Buildroot root file system:
Unfortunately, the last command doesn't install all the components, so further operations are required. Assuming that:
you can easily add the following two targets to the EZSDK_INSTALL_DIR/Makefile:
load-firmware-buildroot-rfs_install:
    cp $(EXEC_DIR).ori/etc/init.d/load-hd-firmware.sh $(EXEC_DIR)/usr/share/ti/ti-media-controller-utils/buildroot_rfs_firmware.sh
    ln -s /usr/share/ti/ti-media-controller-utils/buildroot_rfs_firmware.sh $(EXEC_DIR)/etc/init.d/S70firm
    cp $(EXEC_DIR).ori/usr/share/ti/ti-media-controller-utils/mm_dm81xxbm.bin $(EXEC_DIR)/usr/share/ti/ti-media-controller-utils

load-firmware-buildroot-rfs_clean:
    rm -rf $(EXEC_DIR)/usr/share/ti/ti-media-controller-utils/buildroot_rfs_firmware.sh
    rm -rf $(EXEC_DIR)/etc/init.d/S70firm
    rm -rf $(EXEC_DIR)/usr/share/ti/ti-media-controller-utils/mm_dm81xxbm.bin
The first target completes the installation. The following is a brief description of the commands:
The second target restores the previous situation.
