分类: Windows平台
2014-09-18 10:54:34
本文在介绍了软件安装和设置后, 写了TortoiseGit 常用的一些功能, 包括:
创建新库
添加文件及文件夹
创建分支
看分支情况及修改log
比较版本差异
合并分支
其他操作: Stash; 忽略文件
本文不包括:
Git 服务器设置
Push 版本到服务器上
从其他机器上Pull 版本
解决中文字符问题
《Pro Git》和TortoiseGit 的帮助文档是两篇很不错的参考文档. 如果时间比
较紧, 可以看看TortoiseGit 的帮助文档, 对Git 的用法, 文件存储等都会有比较好
的了解.
对比常用的CVS, Git 至少有以下几个优点:
不需要连接服务器就能实现版本管理;
一个库不管有多少层目录, 只有一个管理目录
在commit 时, 可以将整个项目commit, 这样可以实现不需要添加Tag 就
保存整个版本信息.
在做Tag 时可以添加说明
(1) 安装msysgit
到下载msysgit, 目前能下载到的最新版本是
安装过程中要注意, 在设置行结束转换时, 选择Checkout as-is, commit as-is,
这样Git 就不会修改换行风格了. 其他用缺省设置即可.
到下载TortoiseGit, 目前的最新版本是
安装的过程中, 选择TortoisePLink
这两个软件安装完成后, 就可以开始使用了.
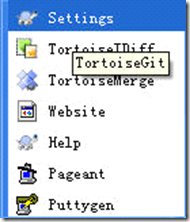
先到TortoiseGit 程序组中调用Settings 进行设置.

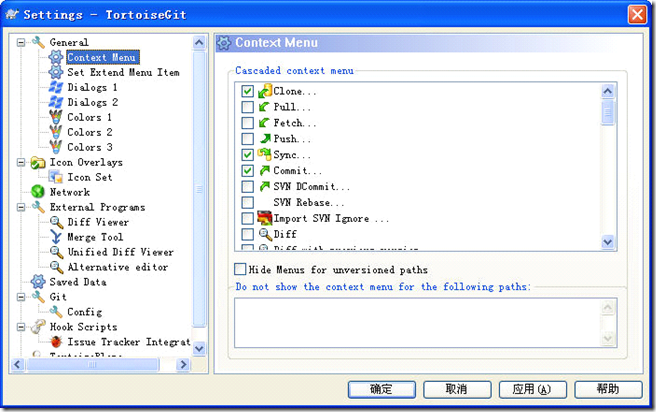
首先需要设置的是用户信息, 没有用户信息, 无法完成其他操作.

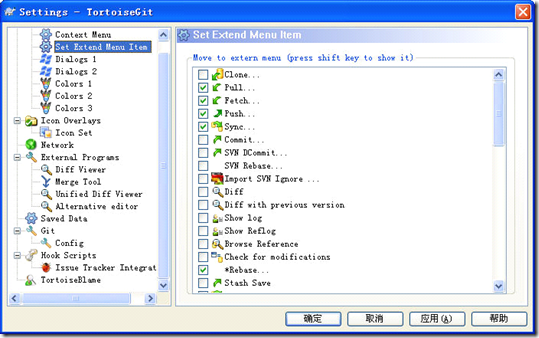
在定制时要注意, 在Set Extend Menu Item 时, 勾选的选项是不显示的选项.
隐藏的菜单在文件夹中按右键时同时按下Shift 就能显示出来.

在External Programs 中, 还可以设置比较工具等, 我设置了WinMerge 为比较
工具.
(1) 创建新库
在文件夹中按右键, 选择Git Create repository here 就可以创建库了.
在出现的窗口中, 不勾选选项, 直接按OK
在目录中就会出现一个名为.git 的隐藏文件夹, 所有库的相关内容都会
存在这个文件夹中. 以后不管这个项目添加多少个文件夹, 整个库只会有这
一个管理文件夹, 这和CVS 和SVN 有较大差异.
(2) 添加文件及文件夹
在文件夹中按右键, 选Git Commit -> “master”…
接着填写Message, 勾选Whole Project 选项, 这样Commit 的时候可以将整个
项目的信息全部Commit 上去, 可以实现不需要打Tag 就能Checkout 出每次
Commit 的内容.
接着修改foo1.txt, 再创建一个文件夹dir1, 并且放置一个foo2.txt 在dir1 目
录中, 再次commit 时, 就可以将dir1 和foo2.txt 一起加入了.
(3) 创建分支
在目录中选择TortoiseGit 再选Create Branch…就可以创建分支了.
勾选Switch to new branch, 就可以跳转到建立好的分支上.
添加一个foo3.txt 后, commit 修改.
接着通过Switch/Checkout….可以切换回master 分支
再创建一个Branch2, 在Branch2 中添加foo4.txt. 下面就可以看版本发展的
情况了.
(4) 看分支情况及修改log
通过选择Show log, 可以看分支情况和修改log
勾选All Branches 可以看到所有分支的情况.在Message 列中, 绿色的是分支, 红色的是当前工作分支.
(5) 比较版本差异
通过按Shift 和鼠标左键, 可以选中两个版本, 接着再按鼠标右键, 选中Compare revisions, 就可以比较两个revision 了.
比较主版本和Branch2, 可以发现是添加了foo4.txt
(6) 合并分支
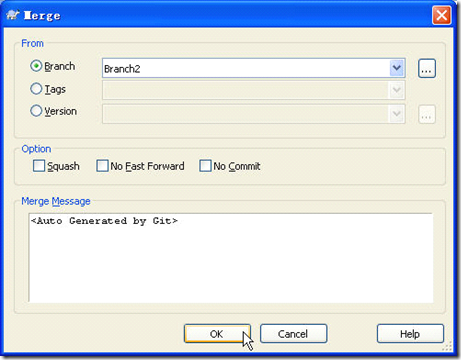
首先切换到master 分支, 接着选Merge
就可以实现将分支合并到主版本

(7) 其他操作
a) Stash
Git 提供了一个暂存修改的功能, 称为Stash, 在一些程序进行了修改, 但还不想commit 成revision 时, 就可以将这些修改Stash 起来, 等到后面需要时再将它
们Pop 出来.
b) 忽略文件
一些编辑器在修改文件后会产生bak 文件, 一般不希望这些备份文件也加入库中, 可以选中一个.bak 文件, 然后选择Add to ignore list 中的*.bak, 这样bak 文
件以后就不会被commit 了.
忽略的文件是通过在项目的目录中添加一个.gitignore 文件实现的, 因此也要将.gitignore 加入忽略文件列表中.
在使用Git Push代码到数据仓库时,提示如下错误:
[remote rejected] master -> master (branch is currently checked out)
错误原型
remote: error: refusing to update checked out branch: refs/heads/master
remote: error: By default, updating the current branch in a non-bare repository
remote: error: is denied, because it will make the index and work tree inconsistent
remote: error: with what you pushed, and will require 'git reset --hard' to match
remote: error: the work tree to HEAD.
remote: error:
remote: error: You can set 'receive.denyCurrentBranch' configuration variable to
remote: error: 'ignore' or 'warn' in the remote repository to allow pushing into
remote: error: its current branch; however, this is not recommended unless you
remote: error: arranged to update its work tree to match what you pushed in some
remote: error: other way.
remote: error:
remote: error: To squelch this message and still keep the default behaviour, set
remote: error: 'receive.denyCurrentBranch' configuration variable to 'refuse'.
To git@192.168.1.X:/var/git.server/.../web
! [remote rejected] master -> master (branch is currently checked out)
error: failed to push some refs to 'git@192.168.1.X:/var/git.server/.../web'
解决办法:
这是由于git默认拒绝了push操作,需要进行设置,修改.git/config文件后面添加如下代码:
[receive]
denyCurrentBranch = ignore
无法查看push后的git中文件的原因与解决方法
在初始化远程仓库时最好使用
git --bare init
而不要使用:git init
git init 和git --bare init 的具体区别:http://blog.haohtml.com/archives/12265
=================================================
如果使用了git init初始化,则远程仓库的目录下,也包含work tree,当本地仓库向远程仓库push时, 如果远程仓库正在push的分支上(如果当时不在push的分支,就没有问题), 那么push后的结果不会反应在work tree上, 也即在远程仓库的目录下对应的文件还是之前的内容。
解决方法:
必须得使用命令 git reset --hard 才能看到push后的内容.
研究了很久不得其解,然后找到一条命令凑合着能用了:
git config --bool core.bare true
就搞定了。
贴一段参考文章:
[参考文献]Create a bare GIT repository
A small rant: git is unable to create a normal bare repository by itself. Stupid git indeed.
To be precise, it is not possible to clone empty repositories. So an empty repository is a useless repository. Indeed, you normally create an empty repository and immediately fill it:
git init git add .
However, git add is not possible when you create a bare repository:
git --bare init git add .
gives an error "fatal: This operation must be run in a work tree".
You can't check it out either:
Initialized empty Git repository in /home/user/myrepos/.git/ fatal: not found: did you run git update-server-info on the server? git --bare init git update-server-info # this creates the info/refs file chown -R
: . # make sure others can update the repository The solution is to create another repository elsewhere, add a file in that repository and, push it to the bare repository.
mkdir temp; cd temp git init touch .gitignore git add .gitignore git commit -m "Initial commit" git push
master cd ..; rm -rf temp