全部博文(1159)
分类: Android平台
2015-07-31 11:48:01
|
|
Firefox 18 | Opera 12 | Chrome 24 | |
|---|---|---|---|---|
| Requires vendor prefix | Yes (moz) | No | Yes (webkit) | |
Triggered with autoplay attribute
|
No | Yes | Yes | |
| Requires enabling by user |
Yes
Firing of playing event
Repeatedly
|
Once
|
Once
|
|
Supports file:// protocol
|
Yes | Yes | No | |
| Tab playing notification | None | Icon | Animated icon | |
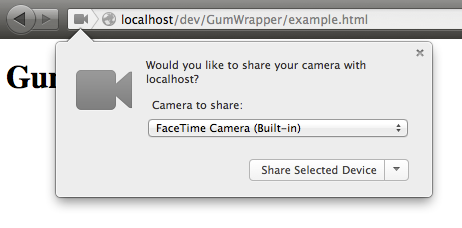
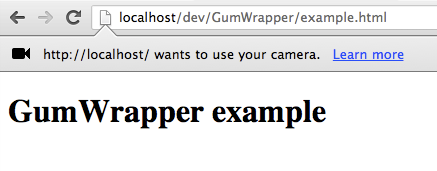
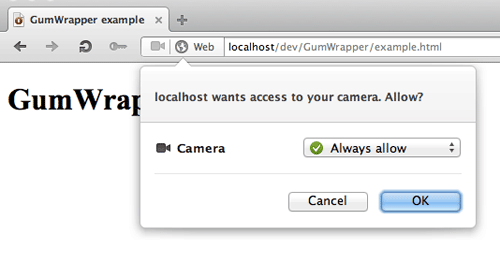
| Permission request | Each page load | First page load only | Each page load |
getUserMedia has to be enabled in Firefox by setting the media.peerconnection.enabled option to true in about:config.
There are a few more differences once we start coding so let’s walk through it. Our recipe for getUserMedia success will be broken down into the following easy steps:
Our main task in this short tutorial is just to get a moving image
displaying in a page. In that respect, it’s no different to regular
video so the first step is a simple <video> element in our HTML:
<video></video>
|
That’s it. No controls, no src, no nothing.
Over to the JavaScript, and obviously we need to get a reference to the <video> element, which we can do like so (or alternatively with an id):
var video = document.querySelector('video'); |
Now it gets interesting as we check for getUserMedia support. We’re
definitely not going to use unreliable user agent sniffing for this —
no, we’ll do it the easy way by checking for the navigator.getUserMedia object. This is prefixed in Firefox and Chrome so first it’s handy to
assign it to a common object for all browsers. While we’re at it, let’s
do it for the window.URL object as well which we’ll use later on.
navigator.getUserMedia = navigator.getUserMedia || navigator.webkitGetUserMedia || navigator.mozGetUserMedia || navigator.msGetUserMedia; window.URL = window.URL || window.webkitURL || window.mozURL || window.msURL; |
And next, the actual existence checking:
if (navigator.getUserMedia) { // Call the getUserMedia method here } else { console.log('Native device media streaming (getUserMedia) not supported in this browser.'); // Display a friendly "sorry" message to the user. } |
If getUserMedia is supported, we need to pass it three arguments — an options object, a success callback function and an error callback function. Note that the error callback is required in Firefox but optional in Opera and Chrome. The options argument is a JSON-style object that specifies whether audio, video or both are to be used. The following example code is for video only:
navigator.getUserMedia({video: true}, successCallback, errorCallback); |
So far so good, so let’s define what happens next. The success
callback function receives an argument containing the video stream from
the camera and we want to send that stream to our <video> element. We do this by setting its src attribute but there are a couple of things to bear in mind:
mozSrcObject attribute whereas Opera and Chrome use src.
createObjectURL method whereas Firefox and Opera send the stream directly.
With Firefox, video.mozSrcObject is initially null rather than undefined so we can rely on this to detect for Firefox’s support (
function successCallback(stream) { if (video.mozSrcObject !== undefined) { video.mozSrcObject = stream; } else { video.src = (window.URL && window.URL.createObjectURL(stream)) || stream; }; video.play(); } |
And there you have it. Add a simple error callback function and we have a working cross-browser script which looks something like this:
window.addEventListener('DOMContentLoaded', function() { 'use strict'; var video = document.querySelector('video'); function successCallback(stream) { // Set the source of the video element with the stream from the camera if (video.mozSrcObject !== undefined) { video.mozSrcObject = stream; } else { video.src = (window.URL && window.URL.createObjectURL(stream)) || stream; } video.play(); } function errorCallback(error) { console.error('An error occurred: [CODE ' + error.code + ']'); // Display a friendly "sorry" message to the user } navigator.getUserMedia = navigator.getUserMedia || navigator.webkitGetUserMedia || navigator.mozGetUserMedia || navigator.msGetUserMedia; window.URL = window.URL || window.webkitURL || window.mozURL || window.msURL; // Call the getUserMedia method with our callback functions if (navigator.getUserMedia) { navigator.getUserMedia({video: true}, successCallback, errorCallback); } else { console.log('Native web camera streaming (getUserMedia) not supported in this browser.'); // Display a friendly "sorry" message to the user } }, false); |
To get started with accessing getUserMedia in a cross web browser fashion, we have also put
A final tip
If you want to do anything fancy with the camera’s stream like
capture a still image or add fancy effects, you’ll probably want to send
its data to a canvas context. You can use
The
Incidentally, you could also use the stream’s dimensions as a further
error check, for example checking whether the width and height are
above 0. This would avoid problems such as the user’s webcam being
broken or simply not plugged in.
And there you have it. I’m sure the differences between browsers will
disappear as the technology matures but for the time being, the above
code should help you on your way.
drawImage() for this, in which case you’ll need the dimensions of the video. These are available through the video.videoWidth and video.videoHeight properties but beware — they’re only set when the browser has
information about the stream. This means you have to listen for certain
events before you can get these properties. There are a few relevant
events, always fired in the following order:
play
loadedmetadata
loadeddata
playing
play event is fired after the video.play() method is called but there may be a slight delay before the video actually starts playing. That’s where the playing event comes in but note that it’s fired repeatedly in Firefox while the
stream or video is playing. Before that are a couple of data events,
the first of which is just for metadata, however in Firefox this doesn’t
include video dimensions. Consequently, the most reliable event to
listen for is the loadeddata event — you can then be sure of knowing the width and height of the video stream. You could code it up like this:
video.addEventListener('loadeddata', function() { console.log('Video dimensions: ' + video.videoWidth + ' x ' + video.videoHeight); }, false);
